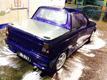
Mat's '88 Mighty Boy.
Haha there is always a next time! After the cheap respray on my current MB, I wanted to basically go all out on this body with with interior, exterior and the whole underside. I'm not even going to want to take it anywhere when its done! 
Boosted F8B Pocket Rocket.
This build has turned a bit dramatic after having to deal with the most common rust spot, which happens to a lot of Might Boys out there. After wire brushing under the dash/heater box area, I found some rust holes right at the very top seam of the firewall. This then spreads out to the top engine mount and then around the panel where the VIN is stamped. I started with removing the scuttle panel and then the piece where the body VIN is.
I have decided that I'll fab up a new top mount, so I took some measurements as to where the bolt holes are and then cut the front section off to see how bad it was in there  .
.
The whole bottom section behind the mount was rotten. I completely removed the mount and cleaned up the area to see what I was dealing with.
With the area cleaned, I etched the area for now until I start cutting the rust out. For how tidy this body is, I wasn't expecting to go this far. If I didn't see the rust make its way into the cabin, it would then show itself eventually after a nice paint job.
Boosted F8B Pocket Rocket.

Wow, I admire your dedication. I can't deal with rust!
F8B EFI turbo - Three pots and a snail.
I will never buy a car that has lived within 100 km of a coastline.
F8B EFI turbo - Three pots and a snail.
Haha its funny how I bought this down the road from me and I'm about 2km from the beach  . This MB originally came from Mount Isa, which is a fair way inland and shows how neat this 30 year old car is when far from sea salt. Long way to travel to Bundy that's for sure!
Boosted F8B Pocket Rocket.
Now that the Easter long weekend has begun, I thought I'd start today off smashing out the rusty section. I am 100% satisfied with this repair and is my best yet. The overlapped section meeting up with the firewall was coated in a Weld-Proof Primer for the plug welds, hence the copper coating.
I'll let the pics do the talking here...
A bit of seam sealer will tidy up the inside welds nicely.
I'll let the pics do the talking here...
Boosted F8B Pocket Rocket.
This might be a stupid question, but are you going to replace the bulkhead?
F8B EFI turbo - Three pots and a snail.
Not stupid at all Brayden, yes the plan so far is to fabricate a new top Bulkhead section and include the VIN from the factory piece. I did have plans to just clean up the standard piece but there is a bit of work to tidy it up in prep for welding back in. If my plans don't exactly work out then I'll go to the extent to tidy up the factory Bulkhead as the bolt holes for the engine mount line up in the factory position.
Boosted F8B Pocket Rocket.
Thanks Gremlin. 
Finally came up with a cover for the Heater Box air inlet.
While I have been working on the front end, I welded up the little holes on both sides of the inner wheel arches/strut towers and deleted the wiper washer bottle holder to make it flush with the rest of the inner panel. I'll end up making and relocating a new washer bottle later on.
I'll be removing the radiator overflow bottle mount as i'll have one similar to a Sierra setup beside the rad.
I'm tossing up whether to put the battery in the tray as I would like to go for a wire tucked/clean engine bay. The area under the battery will need some work as it leaked at some point and has started rusting away, which is another reason to not worry about making another battery mount there.
The hammer and dolly has been getting some use at the front end also, straightening a few things up from a couple of previous love taps.
I have been using a single pack Etch Primer just to cover the bare metal for now until I get the front end soda blasted, which a 2 Pack Epoxy Primer will then be used.
Finally came up with a cover for the Heater Box air inlet.
I'm tossing up whether to put the battery in the tray as I would like to go for a wire tucked/clean engine bay. The area under the battery will need some work as it leaked at some point and has started rusting away, which is another reason to not worry about making another battery mount there.
The hammer and dolly has been getting some use at the front end also, straightening a few things up from a couple of previous love taps.
I have been using a single pack Etch Primer just to cover the bare metal for now until I get the front end soda blasted, which a 2 Pack Epoxy Primer will then be used.
Boosted F8B Pocket Rocket.
Cheers JB 
Original battery location is now rust-free. I had this thought in my head telling me to mini tub the front end, but they are for drift cars and bagged suspension. The amount of work that would go into that is a bit much for looks (even though they actually look amazing in a clean bay ).
).
Going by the few lines I drew, they were ideas as to where I would cut to make a whole new wheel arch, but decided to leave as much as I could and fill in the already massive hole I had originally cut.
Original battery location is now rust-free. I had this thought in my head telling me to mini tub the front end, but they are for drift cars and bagged suspension. The amount of work that would go into that is a bit much for looks (even though they actually look amazing in a clean bay
Going by the few lines I drew, they were ideas as to where I would cut to make a whole new wheel arch, but decided to leave as much as I could and fill in the already massive hole I had originally cut.
Boosted F8B Pocket Rocket.
So clean. Also makes me thankful I don't have to deal with rust.
F8B EFI turbo - Three pots and a snail.