
right so the engine mount for the back is done. we used 25x50 box tube and welded it on to the plate that the gear cables attach to, some mods were needed to make it fit around the manifold, it needs to be shortened about 2 inches.
for the gearbox mount, we used the matiz mounting plate and cut off the rubber mount part since it sticks out way too much, then attached a mighty boy mount under it. this will then be attached to the new cradle.
arklan f8c engine swap
will have a look at the gemini booster tomorrow to get date, but triumph spitfires are a lot heavier than the boy and don't have a booster.
vh44 is smaller than vh 40 and don't work well on a eh with hg discs, but still think would be over sensitive on a boy.
vh44 is smaller than vh 40 and don't work well on a eh with hg discs, but still think would be over sensitive on a boy.
ok we tried to put the mighty boy cvs on today but when we pulled out the matiz gearbox end it has a male end while the mightyboy one has a female end.
so we were thinking to take the gearbox end off the matiz shaft and put it on the mightyboy shaft but we cant get it off, there doesnt seem to be a circlip.
how did u guys get your mightyboy shafts to attach to the matiz gearbox?
edit; just had a look at the manual and it answered a lot of questions, still want to know what u guys did for your shafts tho..
edit2: the manual is in this mightyboy site, all of the matiz stuff comes apart with circlips, the mightyboy drive shaft comes out of the gearbox easily but taking the hub off the drive shaft requires some grunting.
my dad got a engineers hammer and belted the bearings and broke all the little balls then the hub came off.
Last edited by arklan on Thu Mar 08, 2012 11:42 am, edited 1 time in total.
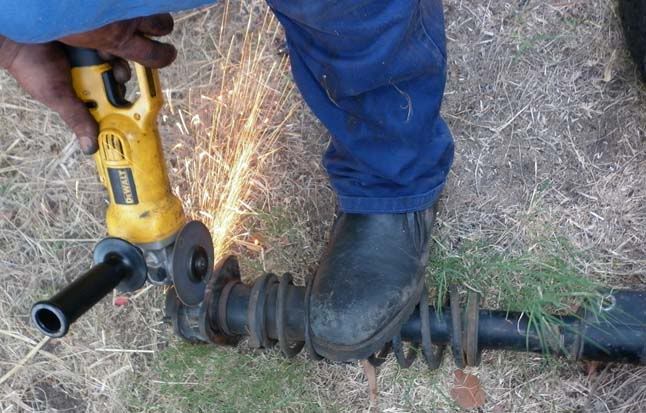
so we'v been sanding down the mighty boy shaft to fit the matiz hubs and gearbox ends, theres a 0.4mm difference and they just wont go unless its done.
using emery paper and the lathe it has taken an entire day to figure out something very crucial.
both shafts have exactly the same number of splines, but the mighty boy ones r also fatter
so with the mightyboy shaft down to 21.6mm and still not fitting this is what i found out.
i sent a pm to kartman to see what he did with his gearbox install but no response yet, anyone out there have any ideas? otherwise its time to attack it with the dremel
edit: got a response from kartman, hes did it with the grinder so we'll do something similar
edit2: for anyone who decides to do this in the future, u need to get a grinder with a very thin blade and cut down the splines so the valleys r wider, if your lucky u may not even need to machine down the splines.
- Attachments
-
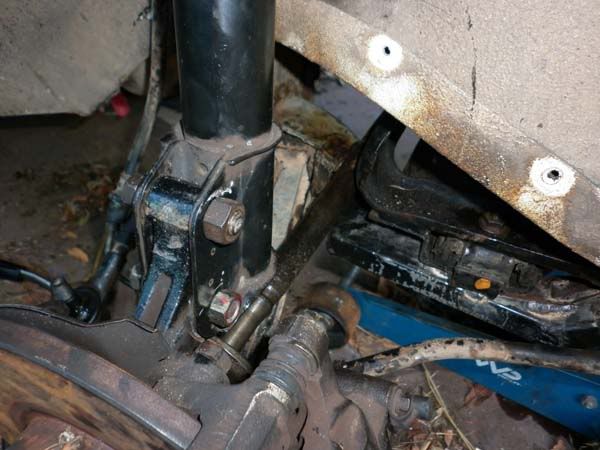
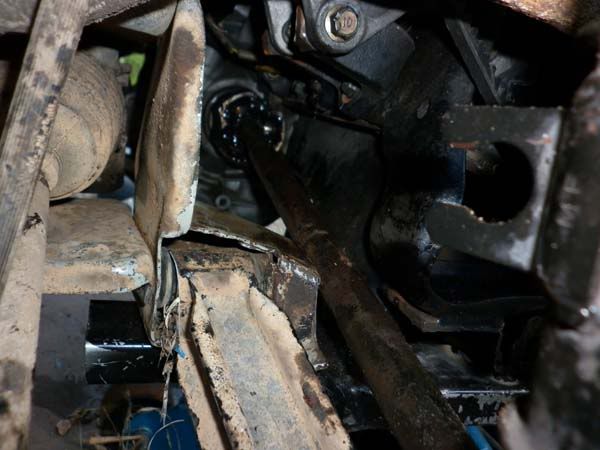
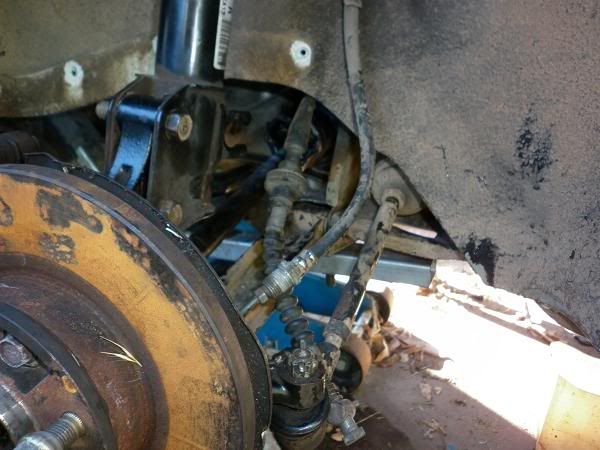
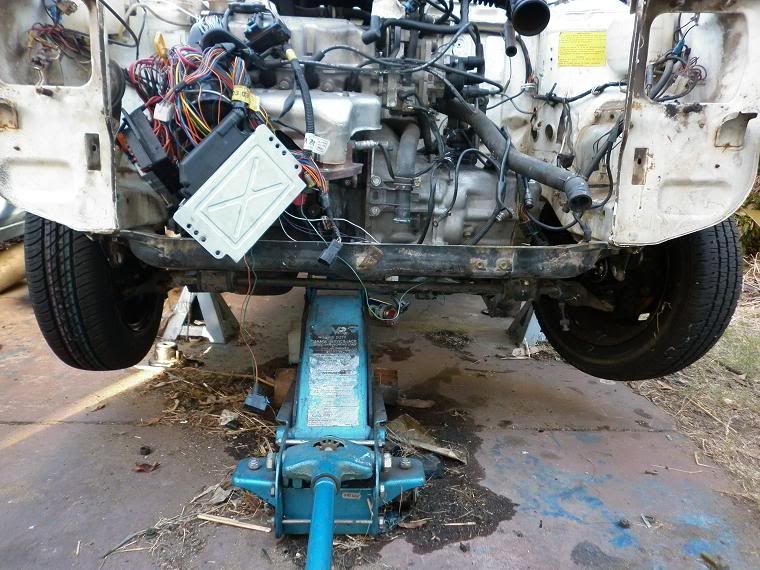
ok so we were putting everything together to see how it fit, to see if the engine needed to be moved in any direction and make sure everything is good before welding and putting it together properly.
from the pictures you can sort of see that the driveshaft is hitting against the subframe.
the struts r the matiz ones with mightyboy caps +added 35mm cap on top to give it a bit more clearance which i had before i started all this nonsense. this makes the matiz struts the closer to the same length as original mightyboy ones.
with the new engine this is too long so we r gonna put in the matiz struts with the mighty boy caps.
for those thinking to use the matiz struts as they r and just drill a hole in the top to make the 2 bolt cap fit, dont bother as the matiz cap is too big for the hole.
so we will have to raise the engine about an inch aswell and everyting should be sweet.
the other thing is that the matiz hubs dont fit inside the mighty boy struts.
if hewball does what he was planning and just cut a little bit of the subframe to make the sump fit and lean the engine right forward, the engine will still sit above the bonnet. but i think hewballs way is a lot more kosher and will probably be neater.
this is true guys (like i said above).Billie wrote:I'v had matiz struts for almost 2 years. You dont drill out the tops. Just the mighty boy stut top on the matiz spring seat.
gearbox side.
with the matiz strut at its original length the whole lot goes together sweet as
the drivers side wheel is straight while the passenger side wheel is turning to the left, in short its trying to give a someone a bear hug.
im not sure whats happened, we didnt touch the tie rods and the matiz hubs appear to be exactly the same.

The knuckles are slightly different. Turn the wheel until both wheels are facing the same, either toe in or out. Best way is to find the centre of the rack. Then adjust tie rods to suit. Dont do what i did years ago and face one forward and adjust the other to suit lol.
╔═══╗ ♪
║███║ ♫
║ (●) ║ ♫
╚═══╝
║███║ ♫
║ (●) ║ ♫
╚═══╝
-
stevan_istheman
- Posts: 851
- Joined: Tue Nov 02, 2004 10:13 am
- Location: Sunshine Coast, Queensland
- Contact:
Billie wrote:The knuckles are slightly different. Turn the wheel until both wheels are facing the same, either toe in or out. Best way is to find the centre of the rack. Then adjust tie rods to suit. Dont do what i did years ago and face one forward and adjust the other to suit lol.
BAL4 Designs
For all your mechanical design and drafting requirements.
For all your mechanical design and drafting requirements.

With the hacked off k-frame it won't really matter what direction you point the wheels, this thing will have a mind of its own on any corner.
F8B EFI turbo - Three pots and a snail.